Scan to PDF Online — Free & Private
Photograph or choose photos of a document, crop and rotate each page, then save as a multi-page PDF, JPG or PNG. Free, private, and processed entirely in your browser — no upload, no account, no file ever leaves your device.
How to use Scan to PDF
Photograph or choose photos of a document, crop and rotate each page, then save as a multi-page PDF, JPG or PNG. Everything runs in this tab — nothing is uploaded for the core job.
- Take or choose a photo — Photograph a document with your camera, or choose an existing image — works for one page or several at once.
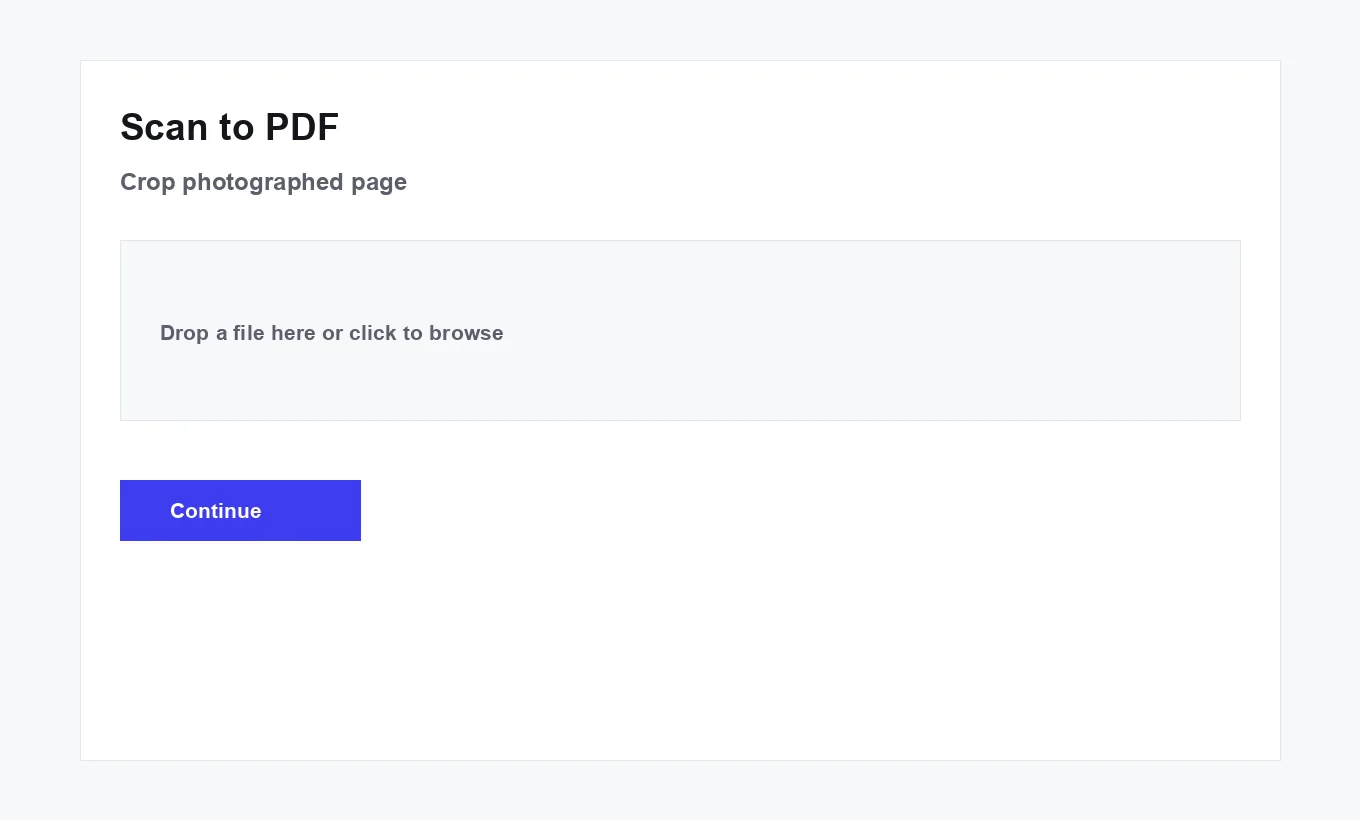
- Crop to the document — Drag the corner handles so the crop box matches the document's edges.
- Rotate and adjust the style — Straighten a sideways photo with the rotate button, and switch to grayscale or black & white for a traditional scanned look if you want it.
- Add more pages, or finish — Save this page and repeat for the next one, or generate the file once every page is ready.
- Download instantly — Get your PDF, JPG, or PNG immediately — nothing was ever uploaded to a server.
Privacy proof for Scan to PDF
This tool processes files in your browser. Open DevTools → Network while you run it: your document is not uploaded. After one online visit, many tools keep working with Airplane Mode on (libraries cached locally).
Popular tools
The highest-demand tools with full options — browse by category below for the rest.
Star any tool — it appears under Favorites on this device.
How this actually works
Each tool runs entirely with JavaScript already loaded in this page — PDF tools via pdf-lib and pdf.js, image tools via the browser's native Canvas API, and everything else with plain JavaScript. Your files or input are read into browser memory, processed, and handed back as a download or copyable result. This page itself is served by a small Laravel route; Laravel never sees your files either. The only backend in use is Supabase, and only for two optional things: signing in with a magic link, and — only if you're signed in — a log of which tool you ran and when. Honest limits worth knowing: Compress PDF flattens each page to a re-encoded image (great for scans, not ideal if you need selectable text after); HEIC conversion uses a small on-demand converter when the browser cannot decode HEIC natively (Safari often works without it); Fill PDF Form is best-effort for simple AcroForm fields, not a full Adobe Forms replacement; and Word/Excel/PowerPoint ⇄ PDF genuinely needs a server-side engine, so it isn't included — this build only ships tools that can honestly run client-side.
Questions people actually ask
How do I scan to PDF?
Take a photo or choose an existing image, drag the corners to crop to just the document, optionally rotate it or switch to grayscale/black & white, then save. Add more pages the same way, or generate the PDF right away.
Does it work on mobile?
Yes — on a phone or tablet the upload step opens your camera directly. On desktop, choose an existing image file instead.
Can I scan multiple pages into one PDF?
Yes — select several photos at once, or add them one at a time. Crop and adjust each, and they combine into a single multi-page PDF.
Can I rearrange the page order?
Not within this tool — pages are added in the order you select them. To reorder afterward, run the finished PDF through Organize Pages.
Can I select a photo from my gallery instead of taking a new one?
Yes — the upload step accepts any existing image file, not just a fresh camera shot.
Can I scan a receipt or a handwritten note?
Yes — it works with any photographed document: receipts, notes, forms, or printed pages.
Can I scan an ID card or a document with personal information?
Yes — and since nothing is uploaded, sensitive documents like this never touch a server in the first place.
Can I convert a JPG or PNG I already have into a scanned-looking PDF?
Yes — you don't need a fresh photo. Choose any existing image file and the same crop, rotate, and filter tools apply to it.
How secure is this?
As secure as your own device — there's no upload step to intercept, no server storing files, and no account that could be breached, because none of that infrastructure is involved.
Does this correct the photo's perspective if I shot it at an angle?
No — it crops to the rectangle you draw but doesn't correct perspective distortion. For the cleanest result, hold the camera level and roughly straight-on.
Can I turn a colour photo into a black-and-white scan?
Yes — the Style option offers Colour, Grayscale, and Black & White (a higher-contrast grayscale look closer to a traditional scanner's output).
What formats can I save as?
PDF (single or multi-page), JPG, or PNG. Multiple pages saved as JPG or PNG are delivered together in a zip file.
Can I control the output file size?
Yes — a compression quality slider (shown for PDF and JPG, since PNG is always lossless) lets you trade sharpness for a smaller file, applied consistently across every page. Pages are also capped at 1200px on the long edge, keeping a multi-page scan from a modern phone camera from becoming an enormous file.
Do I need to install an app for this?
No — it runs entirely in your browser, on any device with a camera and a modern browser. No app store, no install.
Is this really free, and is there a file size limit?
Yes — no account, no paywall. Since processing happens in your browser's memory rather than uploading anywhere, the practical limit is your device's available RAM, not a server quota. Very large files (500+ pages) may run slower, especially for Compress and PDF→JPG.
Does anything about my file get sent anywhere?
No. Every tool runs with pdf-lib/pdf.js loaded in this page; your file is read into browser memory and never leaves it. The only network call this app makes for your account is Supabase auth — and that only stores which tool you ran and when, never file content.
Why isn't Word/Excel/PowerPoint → PDF included?
Converting Office formats accurately needs a real rendering engine (what Word or LibreOffice use internally) — no browser library does this reliably. Rather than ship a broken version, it's left out.
Does TechDriven Tools have OCR (text recognition)?
Yes — OCR PDF recognizes text in scanned or photographed pages using Tesseract.js, running entirely on your device, and gives you a searchable PDF or a plain text file. Nothing is uploaded for this either.
Can I use this without an internet connection?
Once the page and its libraries have loaded once, yes — the tools themselves need no network access. Signing in and viewing history do require a connection, since those talk to Supabase.
What happens to the "history" if I sign in?
Only a row per tool run — the tool's name and a timestamp. No filename, no file content, ever. You can see the full list any time via the History button.
Are the non-PDF utilities (password generator, JSON formatter, etc.) private too?
Yes — same rule as the PDF tools. Word Counter, Case Converter, Password Generator, UUID Generator, Base64, Hash Generator, JSON Formatter and JWT Decoder all run with plain JavaScript already loaded in this page; nothing you type or paste is sent anywhere.
Scan to PDF, in depth
Scan to PDF turns a photo of a paper document into a proper digital file — cropped, rotated, and cleaned up — using nothing but a camera or an existing photo and this page, entirely in your browser.
Features
Manual Crop
Drag the corner handles to trim exactly to the document's edges, or move the whole box at once.
Keyboard-Adjustable Crop
Every crop handle is focusable and adjustable with arrow keys, not just a mouse or touch drag.
One-Tap Rotate
Fix a sideways photo in one tap, 90° at a time — a real pixel rotation, not a CSS preview.
Grayscale & Black & White
Switch to a traditional scanned look when you don't need colour, baked into the actual output.
Multi-Page PDF
Scan several pages one after another and combine them into one document, in the order you add them.
Camera or Gallery
A dedicated "Take a photo" button opens the camera; the main upload step picks an existing photo by default.
PDF, JPG, or PNG
Export in whichever format actually fits — a single-page result downloads directly, multiple pages as PDF or a zip.
Adjustable Compression
A quality slider trades sharpness for a smaller file, applied consistently to every page in the batch.
Private by Design
Every step — crop, rotate, filter, encode — runs on your device. Nothing is ever uploaded.
Instant
No server round-trip, so there's no upload wait between taking a photo and getting a finished file.
How to Scan to PDF, Step by Step
- Add a photo of your document. Choose an existing photo from your device, or tap the dedicated "Take a photo instead" button to open your camera directly. On a multi-page document, select several photos at once, or add pages one at a time — either way, they'll walk through the same crop-and-adjust step in sequence.
- Crop to the document's edges. A crop box appears over the photo with a sensible default inset; drag its corners to match the document's actual edges, or drag inside the box to reposition it without resizing. The crop is manual and rectangular — there's no automatic edge detection, so getting this step right is what determines how clean the final page looks.
- Rotate and choose a style, if needed. A rotate button turns the photo 90° at a time if it came in sideways; a three-way style toggle switches between full colour, grayscale, and a higher-contrast black-and-white look closer to a traditional scanner's output.
- Repeat for additional pages, or finish. For a multi-page document, "Save page & continue" moves to the next photo with the same crop-and-adjust step; on the last page, the button switches to "Generate" and shows the chosen output format. Format and compression quality are set once and apply to every page in the batch.
- Download the result. A single page downloads directly in the chosen format; multiple pages saved as PDF combine into one file, while multiple pages saved as JPG or PNG are bundled into a zip. Nothing is uploaded at any point in this process.
Who Uses This and Why
Receipts & Invoices
Digitise paper receipts the moment you get them, before they fade or get lost in a bag or drawer.
Handwritten Notes & Assignments
Turn a page of handwritten notes or a completed worksheet into a file that can be submitted or filed digitally.
Contracts & Forms
Capture a signed paper agreement or form as a proper PDF the moment it's signed, not weeks later.
ID Documents & Certificates
Keep a digital copy of an ID card or certificate on hand without uploading it anywhere in the process.
Office Paperwork
Handle the paper that still arrives despite everything else being digital — delivered mail, physical sign-offs, printed forms.
Books & Printed Pages
Save a page from a book, a magazine article, or a printed handout as a reference file.
Real Examples
A freelancer digitising a stack of business receipts before a trip ends. A week of client meetings produces a dozen paper receipts, each one a candidate to fade, crease, or get left behind in a jacket pocket before expense reporting time. Photographing and cropping each one the same evening, saving them as a single multi-page PDF, produces one clean expense-ready file before a single receipt has the chance to go missing.
A tenant documenting an apartment's move-in condition. A signed move-in inspection sheet, filled out and signed on paper alongside a property manager, needs to exist somewhere more durable than a folder that might get lost in a future move. Photographing and scanning the signed sheet the same day creates a digital record with a clear, undisputed capture date, kept alongside digital photos of the unit itself.
A student turning in handwritten homework to an online portal. A course's submission system accepts a PDF upload only, but the actual assignment was completed by hand on paper, as the instructor required. Photographing each page, cropping tightly to the paper's edges, and generating a multi-page PDF produces exactly the file format the portal expects, without needing access to a scanner the student doesn't own.
A small business owner archiving signed delivery slips. A delivery driver hands over a signed paper slip at every drop-off, and the business needs a searchable digital trail matching each delivery to its proof of receipt. Scanning each slip the same day, saved as individual PDFs named by date, builds a reliable digital archive without a dedicated scanning device at the loading dock.
A caregiver keeping a copy of a family member's prescription. A printed prescription slip needs to be shared with a pharmacy or a second caregiver without risking the only paper copy. Scanning it to a black-and-white PDF — closer to how a traditional fax or scanner would render it — produces a clean, easy-to-read copy that can be emailed or messaged instantly.
A researcher capturing a page from a library book that can't leave the building. A specific page of a reference book, available only in a reading room with no photocopier nearby, photographed on a phone and cropped tightly to the page's text block, becomes a usable PDF reference without needing to transcribe the content by hand or return another day with a copier.
A landlord collecting a signed lease's final page remotely. A tenant signs a printed lease page in person and needs to get it back to the landlord the same day, with no scanner available at either end. Photographing the signed page, cropping and straightening it as best the camera angle allows, and generating a single-page PDF gets a professional-looking result back to the landlord in minutes rather than days.
A nonprofit volunteer scanning signed donor pledge cards after an event. A stack of paper pledge cards signed at a fundraising event needs to become a digital record before the physical cards risk being misplaced. Photographing each card in sequence, saving them as one multi-page PDF, produces a single archive file matching the order the pledges were collected in.
A traveler scanning a passport page before an international trip. Keeping a digital copy of a passport's photo page separate from the physical document itself is common travel advice, useful if the original is ever lost or stolen abroad. Photographing just that page, cropping tightly, and saving it as a single-page PDF produces exactly that backup — with the added reassurance that, since nothing is ever uploaded, a document as sensitive as a passport page never passes through a third-party server during the process.
A hobbyist digitising a handwritten family recipe card. An aging, handwritten recipe card, the only copy in existence, is worth preserving digitally before it degrades further from years of kitchen use. Photographing it under even light, cropping to the card's edges, and saving it as a PNG (rather than PDF, since the goal here is a shareable image to send to family, not a formal document) keeps the original text legible while creating a backup that survives even if the physical card doesn't.
How It Compares
| Feature | TechDriven Tools | Traditional Scanner | Scanner Apps | Desktop Software |
|---|---|---|---|---|
| Speed | Instant, no upload | Depends on device | Usually fast | Depends on install |
| Privacy | Never leaves your device | Depends on device | Varies — check the app's policy | Local, but often needs install/updates |
| Installation | None — runs in browser | Physical device required | App install required | Download & install required |
| Mobile-friendly | Yes | No | Yes | No |
| Free | Always | Hardware cost | Often freemium / ads | Often paid |
| Perspective correction | Manual crop only | N/A | Often automatic | Varies |
| Multi-page | Yes | Depends on device | Varies by app | Yes |
If the source is already a clean, upright photo or existing scan rather than a fresh camera shot of paper, JPG/PNG to PDF is the faster tool — it skips the crop-and-adjust step this tool adds specifically for photographing physical documents.
The Manual Crop Box
After a photo loads, a rectangular crop box appears over it with a sensible default inset — roughly an 8% margin trimmed from each edge, a reasonable starting point for a photo where the document already fills most of the frame. From there, dragging any of the four corner handles resizes the box from that corner, while dragging inside the box moves the whole selection without resizing it. Every handle also responds to arrow keys once focused, moving the crop edge in 8-pixel steps — a full keyboard alternative to dragging, not an afterthought bolted onto a mouse-only interaction.
The crop is deliberately rectangular and manual — there's no automatic document-edge detection and no perspective correction. Whatever rectangle you draw is exactly what gets extracted, at the photo's original pixel resolution within that rectangle (before any later downscaling — see "Compression Quality and the Size Cap" below). This is a simpler, more predictable model than an "AI edge detection" feature some scanner apps advertise, and it also means the tool never gets a page's boundary wrong by guessing incorrectly on a low-contrast page against a similarly-colored background — you decide the boundary explicitly, every time.
Because the crop coordinates are calculated against the photo's actual displayed size and translated back to its full natural resolution when the page is captured, the crop box behaves consistently regardless of your screen size or zoom level — a crop drawn on a small phone screen extracts the same proportional region of the full-resolution photo as the identical crop drawn on a large desktop monitor.
Rotating and Style Filters
The rotate button turns the photo a genuine 90 degrees by redrawing it onto a new, correctly-dimensioned canvas — not a CSS transform that only changes how the image is displayed. After a rotation, the crop box automatically resets to a fresh default position sized for the new (now swapped) width and height, rather than trying to remap an existing crop selection onto rotated coordinates, which would be both more complex and more error-prone. This means re-cropping after a rotation is expected and normal, not a bug — draw the crop box fresh once the rotation looks correct.
The style toggle offers three options: full colour (no filter applied), grayscale (a straightforward desaturation), and black & white — which is actually a boosted-contrast, brightened grayscale rather than a true two-tone black-or-white threshold, deliberately tuned to look closer to what a traditional flatbed scanner or photocopier produces from a printed page. Whichever style is selected is applied directly during the final capture step — drawn into the canvas at crop time — so it's genuinely baked into the output pixels, not a live preview filter that could be accidentally lost or reset.
PDF, JPG, or PNG Output
Three output formats are available, chosen once and applied to the whole batch. PDF is the default and most common choice — every captured page becomes its own page in one combined document, regardless of how many photos were scanned. JPG and PNG instead export the captured pages as standalone images: a single page downloads directly, while multiple pages are automatically bundled into one scans.zip so a multi-page scan doesn't produce a dozen separate downloads.
Internally, PDF output always embeds each page as a JPEG image inside the PDF regardless of the visible format toggle, since a PDF page built from a photo doesn't benefit from PNG's lossless behavior the way a page of pure text or line art would — a scanned photo already has photographic noise and lighting variation that JPEG compression handles efficiently. Choosing PNG only matters when exporting standalone image files directly (not wrapped in a PDF), where PNG's lossless output can matter more, particularly for a black-and-white style scan with large flat regions of a single color, which PNG compresses very efficiently.
Compression Quality and the Size Cap
A compression quality slider (shown for PDF and JPG output, hidden for PNG since PNG is always lossless) ranges from 30% to 95%, defaulting to 85%, and applies identically to every page in the batch rather than needing to be set per page. Lower settings trade visible sharpness for a smaller file; higher settings keep more detail at the cost of size — the same fundamental tradeoff JPEG compression always involves, just exposed as a direct, single control here.
Every captured page is also capped at 1200 pixels on its longest edge before being encoded, regardless of the source photo's original resolution — a modern phone camera photo, often several thousand pixels on its long edge, gets scaled down to this cap as part of the actual encoding step, not just displayed smaller while the full-resolution data stays embedded underneath. This specific behavior was, in this project's own history, a real fix rather than the original design: an earlier version of this tool embedded the full-resolution photo data into a visually smaller-looking PDF page, which changed nothing about the underlying file size despite looking like a size reduction. The current version genuinely re-encodes at the capped resolution, so the size cap and the quality slider both have a real, verifiable effect on the final file size, not just a cosmetic one.
Together, the 1200px cap and the quality slider are why a multi-page scan from a modern high-resolution phone camera doesn't balloon into an unreasonably large file the way embedding every page at full camera resolution would — 1200px on the long edge is well above what's needed to read ordinary printed or handwritten text clearly, while keeping file sizes practical for emailing or uploading.
Scanning Multiple Pages
Selecting several photos at once, or adding them one at a time, starts a sequential flow: each photo gets its own crop-rotate-style step, one after another, in the order the photos were added. The button at the bottom of each page's screen reads "Save page & continue" until the last page, where it switches to a "Generate" label showing the chosen output format and page count — a clear signal of exactly where you are in the sequence and what happens when you click it.
Format and compression quality are set once, at the point you choose them, and carry through for every subsequent page rather than needing to be re-selected each time — only the crop, rotation, and style filter are genuinely per-page settings, since those depend on each individual photo's own framing and lighting. This design keeps a ten-page scan from turning into ten repetitions of the same format decision, while still letting each page's crop be tailored to that specific photo.
Common Mistakes
Expecting automatic edge detection
The most common mismatch between expectation and reality: some scanner apps advertise automatic document-edge detection, and it's easy to assume this tool does the same. It doesn't — the crop is entirely manual, drawn by you over the photo. This is a deliberate simplicity tradeoff, not a missing feature by accident, and it means the crop is always exactly what you see, never an algorithm's best guess at where a page's edge is against a similarly-toned background.
Expecting perspective correction on an angled photo
A photo taken at a noticeable angle to the page will still look angled after cropping — the crop trims to a rectangle, but doesn't warp or straighten a trapezoidal shape back into a true rectangle. The fix lives in how the photo is taken, not in the tool: hold the camera as level and straight-on as reasonably possible (see "Best Practices" below), since no amount of cropping afterward substitutes for a straighter original shot.
Scanning multi-page documents as separate single-page runs
Running the tool once per page, each time generating and downloading a separate single-page PDF, produces several files instead of the one combined multi-page document most people actually want. Select every photo at once, or use "Save page & continue" to add pages one at a time within a single run — either path combines everything into one file at the end, rather than needing to merge several separate PDFs together afterward.
Forgetting rotation resets the crop box
Rotating a photo resets the crop selection to a fresh default rather than trying to remap the previous crop onto the now-rotated image. Rotating after already carefully cropping means re-cropping afterward — doing the rotation first, before fine-tuning the crop, avoids doing that work twice.
Not checking lighting before photographing a whole stack
Photographing an entire stack of pages under the same poor lighting compounds one mistake across every page rather than just one. A quick test photo and glance at the crop screen before committing to a full multi-page batch catches a lighting problem — a harsh shadow, a glare spot — before it's baked into ten pages instead of one.
Downloading forgotten before closing the tab
Since nothing is uploaded or saved anywhere except your own device, closing the browser tab before downloading the finished file means the scan is genuinely gone — there's no account or cloud history to recover it from afterward. Download the result before navigating away, especially on a longer multi-page scan that took real time to crop and adjust.
Cropping too tightly and clipping part of the document
It's easy to trim a crop box slightly inside the document's actual edge rather than exactly on it, especially on a small screen — losing a sliver of text or a signature at the very edge of the page. Zooming in mentally (or physically, on a device that allows pinch-zoom on the crop screen) before finalizing a tight crop helps confirm the boundary lands just outside the content, not just inside it.
Best Practices for a Clean Scan
Use even, natural light where possible
A single harsh lamp or a strong side light casts shadows across a page that a phone camera picks up far more than your own eye does when looking at the same page directly. Diffuse daylight near a window, or an evenly-lit room, produces a noticeably cleaner photo to crop from than a single point-source light.
Hold the camera level and straight-on
Since this tool crops to a rectangle without correcting perspective, the straighter the original photo, the cleaner the final crop looks. Aim to have the camera roughly parallel to the page, directly above its center, rather than angled in from one side.
Fill the frame with the document before cropping
Photographing the document as large in the frame as reasonably possible — rather than a small document in the middle of a large, mostly-irrelevant photo — keeps more usable resolution inside the eventual crop, since cropping a small region out of a photo only has as much detail as that region originally contained.
Flatten curls and folds before photographing
A curled corner or a visible fold catches light unevenly and is harder to crop cleanly than a flat page, since the crop box is a straight-edged rectangle and can't compensate for a page that isn't actually flat within it. A few seconds spent flattening the paper first, or weighing down a curling corner, pays off in a cleaner result.
Use Black & White style for text-heavy pages meant to look like a traditional scan
If the goal is something that reads like a familiar photocopier or flatbed scan — for an official-feeling document, or simply for maximum readability of dense text — the Black & White style's boosted contrast typically reads more clearly than leaving a page in full colour, especially under imperfect lighting.
Match compression quality to the actual purpose
A quick reference scan of a receipt rarely needs the quality slider above the default; a document being scanned for archival purposes, or one with fine print that needs to stay legible when zoomed in, benefits from a higher setting even at the cost of a larger file.
Place the document on a contrasting, uncluttered background
Since the crop is manual but still benefits from being able to clearly see the document's actual edges while drawing it, photographing on a plain, contrasting surface — a dark desk under a white page, for instance — makes the edges easier to see and crop accurately than a cluttered or similarly-colored background, even though there's no automatic detection depending on that contrast.
Troubleshooting
The photo looks angled even after cropping
This is expected — the crop trims to a rectangle but doesn't correct perspective distortion from an angled shot (see "Common Mistakes" above). Retaking the photo with the camera held more level and straight-on to the page is the only real fix; no amount of adjusting the crop box afterward straightens a genuinely skewed photo.
Tapping "Take a photo instead" doesn't open the camera
This depends on your device and browser correctly supporting the camera-capture input — on most current mobile browsers it works directly, but a very old browser or an unusual in-app browser (opened from within another app rather than a full browser) can behave inconsistently. If it doesn't open the camera, use your device's own camera app to take the photo first, then choose it from the main "Choose existing photo" step instead.
The crop handles are hard to grab precisely on a small screen
Each handle is also keyboard-adjustable once focused (Tab to reach it, then arrow keys to nudge it in small steps) — a reliable fallback on a small screen or for anyone who finds a precise drag gesture difficult, without needing pixel-perfect touch accuracy.
The finished PDF looks softer than the original photo
Every page is capped at 1200 pixels on its long edge and re-encoded at the chosen compression quality (see "Compression Quality and the Size Cap" above) — this is a deliberate, real reduction from a high-resolution source photo, not a rendering glitch. Raising the quality slider before generating the final file recovers some of that sharpness, at the cost of a larger file.
Colors look different from what the room looked like
Camera white balance and the room's actual lighting can shift a photo's colors from what your eye perceived in person — this happens before the photo ever reaches this tool and isn't something cropping, rotating, or the style filter corrects. If accurate color matters, retaking the photo under more neutral, even lighting is the most reliable fix.
The "Generate" button won't finish processing
A very large multi-page batch, especially at a high quality setting, involves genuinely more encoding work per page — give it a moment on an older device rather than assuming it's stuck. If it's been several minutes with the progress bar not moving at all, closing other browser tabs to free up memory and trying again with a smaller batch usually resolves it.
A page is missing from the middle of a multi-page result
Since pages are added strictly in the order photos were selected or captured, a missing page almost always means that specific photo wasn't actually added before starting the sequence, or "Save page & continue" wasn't clicked on it before moving to the next. Restarting the scan and confirming each page is added, one at a time if needed, resolves this more reliably than trying to insert just the missing page afterward.
Deep Dive
What "Scanning" Actually Means Here
A traditional flatbed or sheet-fed scanner captures a document by moving a sensor across it under controlled, even lighting, producing a naturally flat, evenly-lit image with the page's true edges easy to detect. A camera-based scan starts from a fundamentally different capture method — a handheld photo, subject to whatever lighting and angle happen to be available — and this tool's crop, rotate, and filter steps exist specifically to close as much of that gap as possible afterward, entirely through post-processing rather than specialized capture hardware.
Why a Manual Crop Instead of Automatic Detection
Automatic document-edge detection, offered by some dedicated scanner apps, works by analyzing contrast between a page and its background — and works well under good conditions, but can misfire on a low-contrast background (a white page on a light desk, for instance), a page with a torn or irregular edge, or uneven lighting that creates a false edge in the shadow of a fold. A manual crop trades away that convenience for predictability: whatever rectangle you draw is exactly, unambiguously, what gets captured, with no algorithm to second-guess or fight against on a difficult photo.
The Full Processing Pipeline
Each page goes through the same sequence: a photo is loaded and displayed, a crop rectangle is translated from its on-screen position back to the photo's full native resolution, an optional rotation redraws the underlying image before cropping, an optional style filter (grayscale or black & white) is applied at the moment the crop is captured to canvas, and the captured region is then downscaled if needed to the 1200px cap and re-encoded at the chosen quality. Every one of these steps runs as ordinary Canvas API drawing operations in your browser — there's no server-side image-processing pipeline standing in for any part of this.
Handling a Batch of Pages With Different Lighting
Because crop, rotation, and style are all genuinely per-page settings, a batch photographed under inconsistent lighting — some pages in better light than others — can still be adjusted individually rather than forcing one setting across a batch that doesn't uniformly suit it. Applying Black & White specifically to a poorly-lit page while leaving a well-lit page in colour is a legitimate way to even out an inconsistent batch, page by page, rather than accepting the worst page's conditions for the whole document.
Business and Education Use Cases
In an office, this covers the paperwork that still arrives on paper despite everything else being digital: signed contracts, delivery receipts, expense receipts for reimbursement, forms a client handed over in person. In a classroom, it's assignments handed in on paper that need to go into a digital gradebook, handwritten notes worth keeping past the semester, or a worksheet that needs sharing with a student who missed a class. Neither case needs an app installed on a shared or managed device — a browser is already there.
Digital Archiving as a Practical Habit
Paper degrades — receipts fade, folds develop into tears, ink smudges — in a way a digital file, backed up in the ordinary course of using a device, simply doesn't. Building a habit of scanning important paper documents shortly after receiving them, rather than filing the physical original and hoping to find it again months later, is a meaningfully more durable way to keep records, independent of any specific tool used to do the scanning.
Why Camera-Based Scanning Became Practical
Modern phone camera sensors, even on mid-range devices, capture more than enough resolution for the 1200px output cap this tool applies to be a genuine downscale rather than a stretch — a decade ago, a typical phone camera's native resolution would have made this tool's fixed cap the limiting factor rather than a comfortable margin above what's needed. That gap between "camera resolution" and "resolution actually needed for a legible document" is a large part of why camera-based scanning apps have become a practical substitute for a dedicated scanner for most everyday paper, even though the capture method (a handheld photo) is fundamentally less controlled than a flatbed scanner's fixed, even sweep across a page.
What a Scan Can't Recover From the Original
A camera-based scan, however carefully cropped and adjusted, can't recover detail that a poor original photo simply didn't capture — a blurry shot stays blurry, and text too small to read clearly in the source photo won't sharpen through cropping or a style filter. This is worth keeping in mind for a document where legibility genuinely matters: the photo itself, not the adjustments made to it afterward, sets the ceiling on how good the final result can be.
OCR and Searchable Text
OCR (optical character recognition) turns the picture of text in a scanned page into actual, selectable, searchable text — the difference between a scan you can only look at and one you can search or copy from. This tool doesn't perform OCR itself: the output is a genuine PDF or image file, but the text inside it is still part of the picture, not machine-readable text, the same as a photocopy.
If searchable or selectable text is the actual goal — being able to search a document's contents later, or copy a paragraph out of it — run the finished scan through OCR PDF as a second, separate step. That tool reads the visual content of a page and adds a real text layer underneath it, producing a document that both looks the same and can be searched and copied from, which a plain scan on its own can't do. Keeping these as two distinct, focused tools rather than bolting a partial OCR feature onto this one keeps each tool doing its actual job well, rather than a scanning tool doing text recognition poorly as an afterthought.
Mobile Scanning and Camera Access
On a phone or tablet, two distinct entry points are offered rather than one input trying to do both jobs: the main upload step defaults to choosing an existing photo from your device, while a separate, explicit "Take a photo instead" button opens the camera directly. This two-button design is a deliberate fix for a real cross-browser inconsistency — a single file input with a generic "capture" attribute, hoping the device shows a chooser with both camera and gallery options, actually skips straight to the camera on a meaningful number of real mobile browser and OS combinations, silently removing the "pick an existing photo" path entirely. Splitting camera and gallery into two clearly separate, always-available entry points guarantees both paths reliably work, regardless of that inconsistency.
Beyond the upload step, the crop handles are sized and spaced with touch in mind, not just a mouse cursor, and every control — crop, rotate, style, format, quality — works identically whether you're tapping or dragging. There's genuinely no reason to install a separate dedicated scanning app for something this thoroughly covered inside the same browser tab you're already using.
Industry Applications
Legal and Real Estate
Capturing a signed agreement, disclosure, or inspection form the moment it's signed in person, producing a digital record with a clear capture timestamp rather than relying on a physical original staying safe until it can be scanned properly later.
Healthcare
Digitising a paper intake form, referral note, or prescription slip on the spot, with the same privacy posture as handling the paper directly, since nothing is uploaded to a third-party server at any point.
Retail and Field Service
Scanning signed delivery confirmations, work orders, or on-site paperwork immediately after a job or drop-off, building a reliable digital paper trail without a dedicated scanning device in the field.
Education
Converting handwritten assignments, worksheets, or lab notes into the PDF format most learning-management-system submission portals expect, without needing access to a scanner outside class.
Insurance
Capturing physical documentation — a signed claim form, a handwritten incident description — as part of a claims submission that otherwise happens entirely online.
Nonprofits and Community Organizations
Digitising signed pledge cards, volunteer forms, or paper sign-in sheets collected at in-person events, before physical copies risk being lost between the event and later data entry.
Small Business and Bookkeeping
Capturing paper receipts and invoices the same day they're received, rather than accumulating a shoebox of originals to scan properly at tax time, by which point several may have faded or gone missing.
Personal Records and Household Management
Keeping digital copies of warranties, appliance manuals, medical records, and other paper documents worth having a durable backup of, independent of whether the physical original survives a future move or a spill.
Travel and Hospitality
Digitising a passport photo page, a visa document, or a printed itinerary before a trip, giving a recoverable backup independent of whether the physical document is lost, damaged, or stolen while traveling.
Publishing and Research
Capturing a page from a printed source — a book, a journal article, an archival document — for reference or citation purposes, when photocopying isn't practical or permitted.
Scan to PDF vs. Similar Tools
- Scan to PDF vs. JPG/PNG to PDF. This tool is built specifically for photographing a physical document, adding the crop, rotate, and grayscale/black-and-white steps a real scan needs. JPG/PNG to PDF takes images you already have — screenshots, existing scans, clean photos — and combines them exactly as they are, with no cropping or cleanup step. If your image is already clean, cropped, and upright, JPG/PNG to PDF is faster; if you're starting from a fresh photo of a piece of paper, Scan to PDF is the right tool.
- Scan to PDF vs. OCR PDF. This tool produces an image-based document that looks like a scan but has no selectable text. OCR PDF is the separate tool that adds a searchable text layer to a document, run as a second step on a finished scan if searchable text is actually needed — see "OCR and Searchable Text" above.
- Scan to PDF vs. PDF to JPG. Opposite directions and different starting points — PDF to JPG turns pages of an existing PDF into images; this tool turns a fresh photo of paper into a PDF or image.
- Scan to PDF vs. a dedicated scanner app. A phone scanner app often adds automatic edge detection and perspective correction this tool intentionally doesn't attempt (see "Why a Manual Crop Instead of Automatic Detection" above) — a reasonable trade for not needing to install anything, at the cost of doing the cropping step yourself.
Under the Hood
Every step of this tool runs through the browser's own Canvas API — there's no dedicated image-processing library involved for the crop, rotate, and filter steps. A crop is captured by drawing the relevant rectangle of the source photo onto a new canvas sized to that rectangle's dimensions (scaled from the photo's displayed size back to its full natural resolution), with any selected style filter (grayscale(1), or a combined grayscale(1) contrast(1.6) brightness(1.1) for the Black & White look) applied as a canvas filter at the moment of that draw call — which is what makes the filter a genuine, baked-in part of the captured pixels rather than a display-only effect.
Rotation works similarly: a new canvas is created with swapped width and height, the drawing context is translated and rotated 90 degrees, and the original image is redrawn into that rotated space — a real pixel-level transformation, confirmed directly in the tool's own code, not a CSS transform: rotate() that would only change how the browser displays an unchanged underlying image.
Before final encoding, any captured page exceeding 1200 pixels on its longest edge is downscaled proportionally on yet another canvas, then encoded via the browser's native canvas.toBlob() API at the chosen format and quality — image/jpeg at the selected quality percentage for JPG output and for pages destined for a PDF, or image/png (always lossless, ignoring the quality parameter) for PNG output. For PDF output specifically, each page's encoded JPEG bytes are handed to pdf-lib's embedJpg(), added to a new page sized to match, and the assembled document is serialized to PDF bytes once every page is processed. For JPG or PNG output with more than one page, the individually encoded images are instead bundled by JSZip into one scans.zip, built entirely client-side. At no point in any of this does a photo, a crop, or a finished file leave your device.
Document Metadata
A scan saved as PDF starts as a brand-new document created fresh for that output — it carries no document metadata (title, author, subject) beyond pdf-lib's own minimal defaults, since there's no source PDF to inherit metadata from in the first place; the input is a photo, not a document with its own metadata fields. If a specific title or other metadata is needed afterward — for a document-management system that indexes by it, for instance — set it explicitly with Edit PDF Metadata once the scan is finished.
Reordering Pages Afterward
Pages are added, and appear in the finished multi-page PDF, in exactly the order the source photos were added — there's no in-tool reordering step, so getting the photo order right before or during the capture sequence is the only way to control final page order directly here. If pages ended up in the wrong order after the fact — photos added out of sequence, or an extra page that needs to move — Organize Pages is the tool for fixing that afterward, reordering, rotating, or deleting pages inside an already-finished PDF without needing to re-scan anything.
Expert Tips for Power Users
Photograph everything first, crop in one focused pass
For a large stack of pages, taking every photo first (using "Take a photo instead" repeatedly, or a device's own camera app if scanning many pages at once) and only then working through the crop-and-adjust sequence for all of them tends to be faster than photographing and immediately cropping one page at a time — it keeps the physical act of photographing separate from the more deliberate, visual act of cropping.
Use consistent lighting across a whole batch
Photographing an entire document under the same lighting setup, rather than moving between differently-lit spots between pages, produces a much more visually consistent finished PDF — worth a small amount of setup time (a well-lit table, a consistent angle) before starting a long multi-page scan.
Reserve the highest quality setting for text that genuinely needs to stay sharp
The default 85% quality setting is a reasonable middle ground for most everyday scans; reach for the top of the range specifically when fine print, small handwriting, or a document likely to be zoomed in on later is involved, since that's where compression artifacts become genuinely noticeable rather than invisible at normal viewing size.
Keep the original photos briefly, even after generating the PDF
Since crop and rotation adjustments happen from the original photo each time a page is processed, keeping the source photos on your device for a short while after generating the final file makes it easy to redo a page that didn't crop quite right, without needing to retake the photo entirely.
Batch by document type, not by convenience
Scanning all of one document type together (all of a month's receipts, for instance) rather than mixing unrelated documents into one multi-page run keeps the resulting files logically organized from the start, rather than needing to split one large mixed-content PDF apart later with Split PDF or Extract Pages.
Practical Limits
There's no fixed cap on how many pages can be scanned in one run — the practical ceiling is your device's available memory while holding each page's captured canvas before the final export step, since every page's processing happens in your browser rather than being offloaded to a server as it's captured. Individual source photos carry the same 150MB soft size guideline as file uploads elsewhere on the site, though a typical phone camera photo (a few megabytes) is nowhere near that limit.
Every output page, regardless of source photo resolution, is capped at 1200 pixels on its longest edge as part of encoding (see "Compression Quality and the Size Cap" above) — this is a fixed behavior, not a setting, and it applies the same way whether the source photo came from an older phone or the newest available camera sensor. For nearly all document-scanning purposes — reading text, referencing content, printing a reasonable-quality copy — 1200px on the long edge is well above what's actually needed for legibility.
Keyboard and Screen-Reader Accessibility of This Tool
Every crop handle carries an explicit role="button" and a descriptive aria-label explaining what it resizes and that arrow keys adjust it, so a screen-reader user gets a clear, spoken description of each control rather than an unlabeled draggable element. Arrow-key adjustment on each handle provides a full keyboard alternative to the drag gesture, moving the crop edge in fixed, predictable steps. Status updates ("Saving page…," "Finishing…," the final "Done" message) are announced through an ARIA live region, giving a screen-reader user the same progress feedback a sighted user sees visually during what can be a genuinely multi-step, multi-page process.
When Not to Use This
If the source is already a clean, upright image rather than a fresh photo of paper — an existing scan, a screenshot, a photo taken previously that doesn't need cropping — JPG/PNG to PDF is faster, since it skips the crop-and-adjust step entirely. If the actual goal is searchable or selectable text rather than an image-based document that merely looks like a scan, this tool alone doesn't provide that — OCR PDF, run as a second step on the finished scan, is what adds real text recognition (see "OCR and Searchable Text" above). And for a document that genuinely needs professional-grade perspective correction and automatic edge detection on a difficult, sharply-angled source photo, a dedicated scanner app's more automated pipeline may produce a cleaner result with less manual cropping effort than this tool's deliberately simple, manual approach.
Who This Is For — And Its Honest Limitations
This tool is a good fit for anyone turning a photo of a physical document — a receipt, a signed form, a handwritten page — into a clean, croppable, shareable PDF or image, without needing a dedicated scanner or a separate app installed. It's not a fit for a few specific cases, worth stating plainly:
- Automatic edge detection or perspective correction on a sharply-angled photo. The crop is entirely manual and rectangular; a dedicated scanner app's more automated pipeline may handle a difficult angled shot better.
- Searchable or selectable text. The output looks like a scan but has no text layer — OCR PDF is the separate tool for adding one.
- Already-clean, existing images. If there's nothing to crop or straighten, JPG/PNG to PDF is the faster, more direct tool.
- Reordering pages after the fact. Pages land in the order photos were added, with no in-tool reorder step — use Organize Pages on the finished file if the order needs fixing.
- Maximum possible resolution for archival purposes. Every output page is capped at 1200px on its long edge — more than sufficient for everyday legibility, but a hard ceiling if a specific project genuinely requires a higher-resolution capture.
None of these are hidden limitations discovered by trial and error — each follows directly from a deliberate design choice (simplicity and predictability over automated guessing, a focused single job over trying to also do OCR) rather than an arbitrary restriction.
Automation and Repeatability
This tool is a manual, one-photo-at-a-time browser interface built around a human making crop and rotation decisions for each page — there's no scripting API, and by its very nature (a person needs to draw each crop box) it isn't something that could be meaningfully automated even if an API existed, unlike a purely mechanical operation such as merging files. For a genuinely high-volume, unattended digitisation need — scanning thousands of pre-existing documents through a fixed pipeline, for instance — a dedicated document-scanning hardware setup with automatic feed and edge detection is a fundamentally better-suited tool than a manual, one-photo-at-a-time browser flow built for occasional, camera-based capture.
Glossary
Crop
Selecting a rectangular region of a photo to keep, discarding everything outside it. Here, entirely manual — you draw the rectangle directly.
Perspective correction
Digitally warping an image shot at an angle back into a true rectangle, correcting for the camera not being perfectly perpendicular to the page. This tool doesn't perform this — see "Common Mistakes" above.
OCR (optical character recognition)
Reading the visual shapes of text in an image and converting them into real, selectable, searchable text. Not performed by this tool — see "OCR and Searchable Text" above for the dedicated tool that does.
Canvas API
A browser feature for drawing and manipulating images programmatically. Every step here — crop, rotate, filter, downscale, encode — is built on top of it, entirely client-side.
Long-edge cap
The 1200-pixel limit applied to each output page's longer dimension during encoding, regardless of source photo resolution — see "Compression Quality and the Size Cap" above.
Privacy & Security
- Files are never stored — nothing is written to a server, ever.
- All processing happens in your browser, using pdf-lib and the Canvas API.
- No registration or account required to use any of this.
- Nothing is transmitted, so there's nothing in transit to intercept.
- Downloads come straight from your browser's own memory to your device.
From our blog: How to Scan Documents to PDF on Phone or Desktop