Cada archivo que tocas aquí se queda en tu máquina.
Herramientas PDF, de imagen, para desarrolladores, SEO, de texto, para estudiantes y empresas — todas gratis, todas enteramente en tu navegador. Sin subidas, sin cuenta, ningún servidor ve tus datos.
Popular tools
The highest-demand tools with full options — browse by category below for the rest.
How this actually works
Each tool runs entirely with JavaScript already loaded in this page — PDF tools via pdf-lib and pdf.js, image tools via the browser's native Canvas API, and everything else with plain JavaScript. Your files or input are read into browser memory, processed, and handed back as a download or copyable result. This page itself is served by a small Laravel route; Laravel never sees your files either. The only backend in use is Supabase, and only for two optional things: signing in with a magic link, and — only if you're signed in — a log of which tool you ran and when. Honest limits worth knowing: Compress PDF flattens each page to a re-encoded image (great for scans, not ideal if you need selectable text after); HEIC conversion depends on your browser (Safari usually works; Chrome often cannot decode HEIC without a library we don't ship); Fill PDF Form is best-effort for simple AcroForm fields, not a full Adobe Forms replacement; and Word/Excel/PowerPoint ⇄ PDF genuinely needs a server-side engine, so it isn't included — this build only ships tools that can honestly run client-side.
Questions people actually ask
Will compressing reduce quality?
Yes, by design — every page is re-rendered as an image at the quality level you choose. It's a real trade-off between file size and sharpness, not a free lunch.
How much smaller will my file get?
It depends how much of the file is images versus text — an image-heavy scanned PDF shrinks far more than a mostly-text document.
Why does the text stop being selectable after compressing?
Compress re-renders every page as a picture at your chosen quality, so what was real, selectable text becomes part of an image. That's what makes the size reduction possible — it isn't a bug.
Can I choose exactly how much compression to apply?
Yes — a quality slider from 30% to 92% controls the trade-off between file size and sharpness; drag it and re-run to compare results.
Can I compress a scanned PDF?
Yes — scanned or image-heavy PDFs usually shrink the most, since they're already mostly images being re-encoded at a lower bitrate.
Will compressing a text-only PDF do much?
Not usually much — there's little to re-encode. A scanned or image-heavy PDF sees far bigger reductions.
Can I undo compression?
No — it's one-way. Keep your original file if you might need the selectable-text version again later.
Does it work on very long PDFs?
Yes — very large page counts render at a slightly reduced scale automatically to keep memory use and processing time reasonable.
Can I compress multiple files at once?
No — one file at a time; run it again for additional files.
Is there a way to target a specific file size, like under 1MB?
Not directly — you control the quality percentage, and the resulting size is shown once it's done. Lower the slider and re-run if you need it smaller.
Does compressing keep my file's metadata (title, author)?
No — the compressed file is built as a brand-new document, so it starts with blank metadata rather than carrying over the original's title, author, or other fields. Use Edit PDF Metadata afterward if the compressed file needs specific metadata set.
Can I compress a password-protected PDF?
Not directly — the password needs to be removed first, since the tool can't open an encrypted file to read its pages.
Can I preview the result before downloading?
Not as a live preview, but the status message shows the exact before-and-after file size once it finishes, so you can immediately try a different quality level if needed.
Is this really free, and is there a file size limit?
Yes — no account, no paywall. Since processing happens in your browser's memory rather than uploading anywhere, the practical limit is your device's available RAM, not a server quota. Very large files (500+ pages) may run slower, especially for Compress and PDF→JPG.
Does anything about my file get sent anywhere?
No. Every tool runs with pdf-lib/pdf.js loaded in this page; your file is read into browser memory and never leaves it. The only network call this app makes for your account is Supabase auth — and that only stores which tool you ran and when, never file content.
Why isn't Word/Excel/PowerPoint → PDF included?
Converting Office formats accurately needs a real rendering engine (what Word or LibreOffice use internally) — no browser library does this reliably. Rather than ship a broken version, it's left out.
Does TechDriven Tools have OCR (text recognition)?
Yes — OCR PDF recognizes text in scanned or photographed pages using Tesseract.js, running entirely on your device, and gives you a searchable PDF or a plain text file. Nothing is uploaded for this either.
Can I use this without an internet connection?
Once the page and its libraries have loaded once, yes — the tools themselves need no network access. Signing in and viewing history do require a connection, since those talk to Supabase.
What happens to the "history" if I sign in?
Only a row per tool run — the tool's name and a timestamp. No filename, no file content, ever. You can see the full list any time via the History button.
Are the non-PDF utilities (password generator, JSON formatter, etc.) private too?
Yes — same rule as the PDF tools. Word Counter, Case Converter, Password Generator, UUID Generator, Base64, Hash Generator, JSON Formatter and JWT Decoder all run with plain JavaScript already loaded in this page; nothing you type or paste is sent anywhere.
Compress PDF, in depth
Compressing shrinks a PDF's file size by re-rendering each page as an optimized image at a quality level you choose — entirely in your browser, with a real, disclosed trade-off: pages stop being selectable or searchable text afterward.
Features
Adjustable Quality Slider
A single 30%–92% slider controls the trade-off between file size and sharpness, with a live hint as you drag it.
Real Before/After Sizes
The result message shows the exact original and compressed size, plus the percentage saved — not a vague "smaller" claim.
Handles Long PDFs
Files over 60 pages automatically render at a slightly reduced scale to keep memory and processing time reasonable.
Instant
No server round-trip and no upload wait — compression starts the moment you click Run.
Private by Design
Your file is read directly into your browser's memory and never leaves your device.
Works on Mobile
The same quality slider and one-tap run work identically on a phone browser.
Page Dimensions Preserved
Each compressed page keeps the original page's exact width and height — only the visual content becomes a raster image.
Handles Restricted PDFs
PDFs with owner-level restrictions (no open password, just permission flags) load and compress normally.
Repeatable
Re-run at a different quality as many times as you like from the same original file, no extra cost or limit.
Free Forever
No account, no file-count limit, no watermark, on any file.
How to Compress a PDF, Step by Step
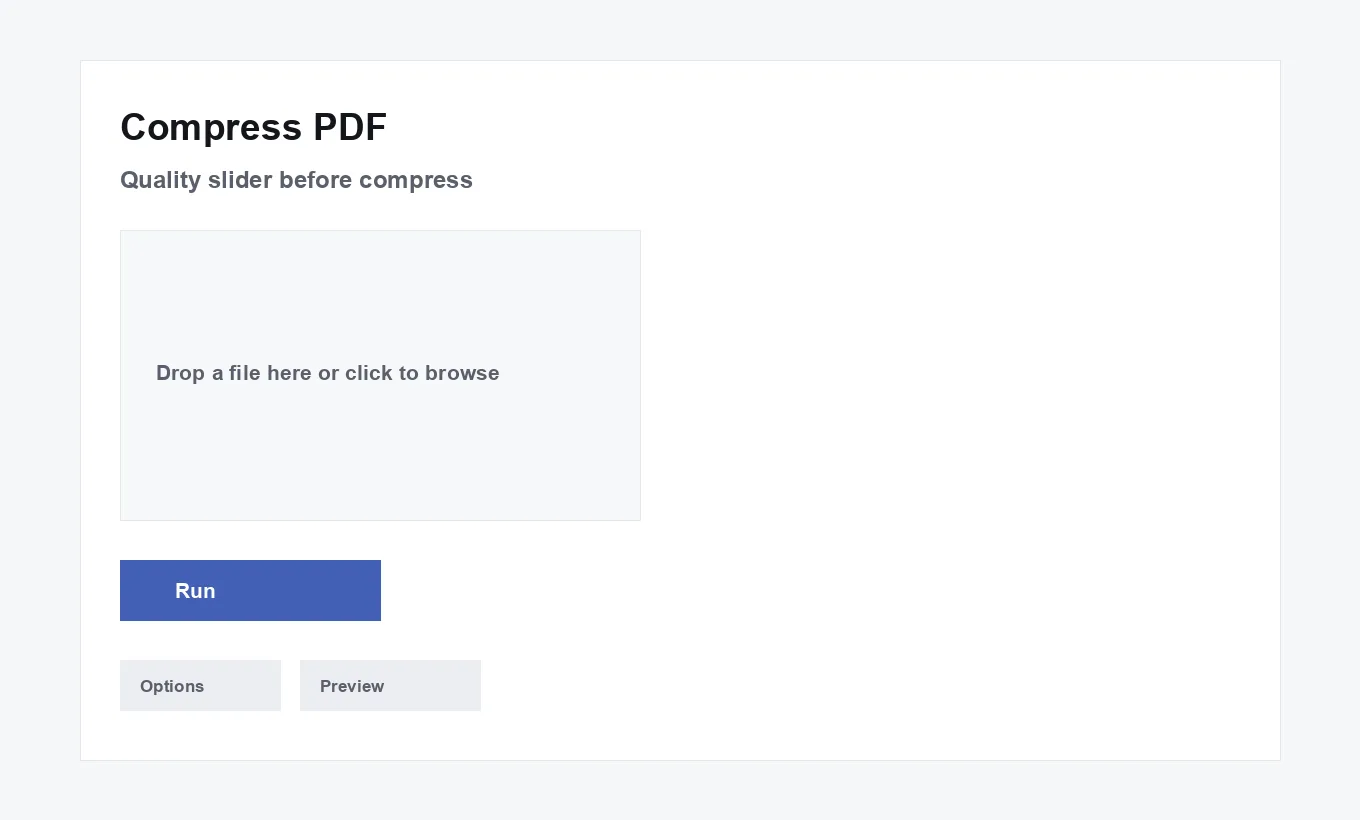
- Add your file. Drop one PDF onto the upload area, or click it to browse your device. Only one file is compressed at a time — for several files, run the tool again on each one.
- Choose a quality level. A slider from 30% to 92% controls the trade-off, defaulting to 65%. Lower values produce a smaller file at a visibly softer, more compressed look; higher values stay sharper but save less space. The hint text under the slider updates live as you drag it.
- Run the compression. Click "Run Compress PDF." Each page is rendered to a canvas, re-encoded as a JPEG at your chosen quality, and rebuilt into a new PDF — a progress bar tracks page-by-page progress. This takes noticeably longer than a copy-based operation like merging, since every page is genuinely being redrawn, not just copied.
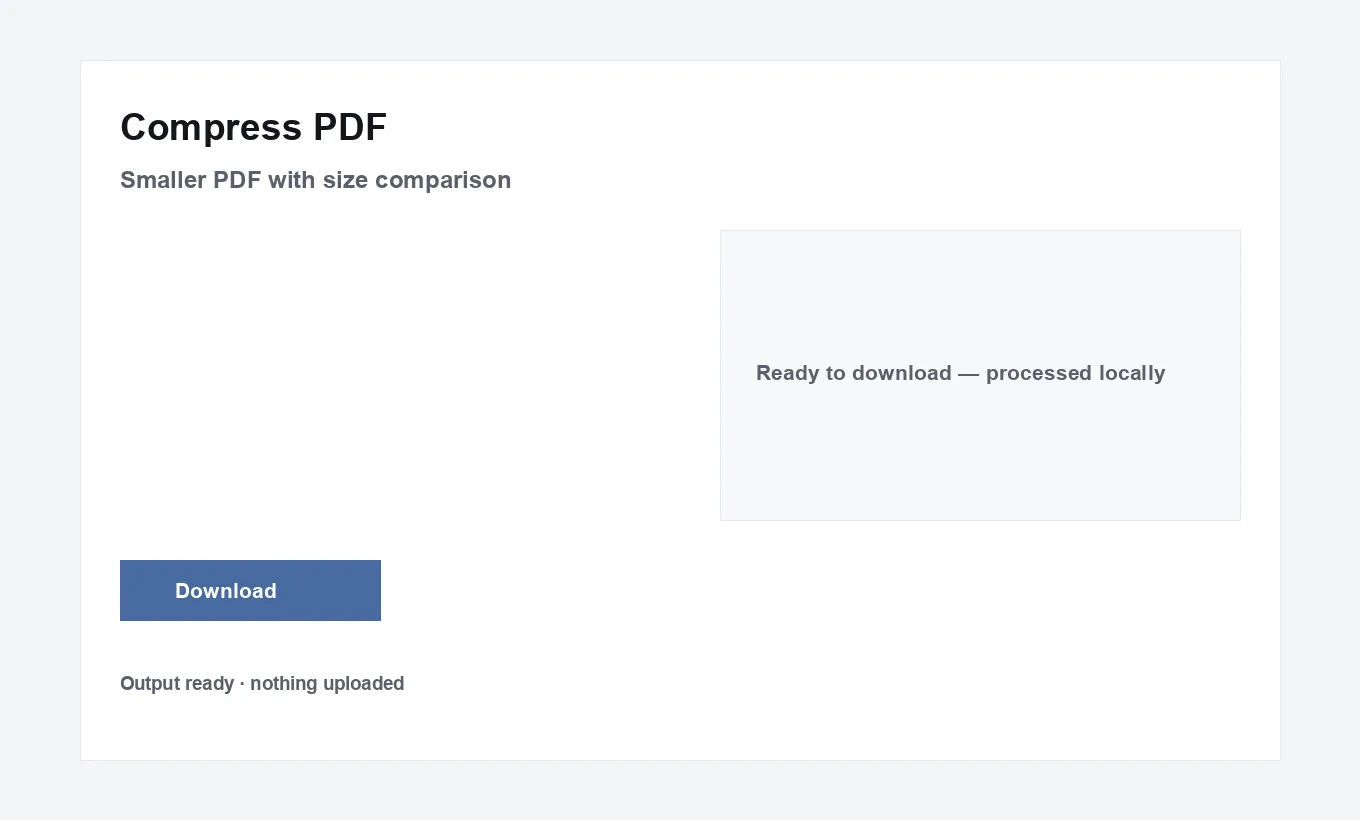
- Download the result. The status message reports the exact before-and-after size and percentage saved, and
compressed.pdfis ready to download. If the savings aren't enough, drag the slider lower and run again from the same original file — nothing about a previous run is kept or needed.
Who Uses This and Why
Email Attachment Limits
Shrink a scanned document or report under a mail provider's attachment size cap without leaving out any pages.
Scanned Document Archives
Reduce the storage footprint of a large batch of scanned paperwork kept for reference, not active editing.
Faster Website Uploads
Shrink a PDF before uploading it to a portal or CMS with its own file-size restrictions.
Photo-Heavy Reports
Cut the size of a report or brochure built mostly from embedded photos, where the images dominate the file size.
Mobile Data Savings
Produce a smaller version of a document specifically to send or download on a limited mobile data plan.
Faster Sharing to Multiple Recipients
Send a lighter file to a large distribution list, where every recipient's download time and storage adds up.
Real Examples
A job applicant with a scanned transcript. A university transcript scanned at high resolution comes out as an 18MB PDF — well over a job portal's 5MB upload cap. Compressing at the default 65% quality brings it down to a few megabytes, still perfectly legible on screen even though the underlying text is no longer selectable — an acceptable trade for a document that was a scanned image to begin with, not real text.
A real estate agent sending listing photos. A property brochure PDF built from a dozen high-resolution photos is too large to email directly. Compressing at 75% keeps the photos clearly presentable while cutting the file to a size that goes through most mail providers without a "file too large" bounce.
A small business archiving old invoices. A folder of scanned paper invoices, each originally 2-3MB, compressed down to a few hundred kilobytes each before being filed away for tax records — the invoices only ever need to be readable for reference, not edited or searched by exact text.
A student submitting a scanned assignment. A photographed and PDF-converted handwritten assignment comes out large due to the photo resolution; compressing before uploading to a course portal with its own size limit avoids a rejected upload right before a deadline.
A nonprofit reducing storage costs. Years of scanned program records stored in cloud storage, individually compressed before re-uploading, meaningfully reducing total storage used and the associated cost, since the records are kept for reference rather than active editing.
A photographer delivering a portfolio PDF. A photography portfolio built with full-resolution images is compressed at a higher quality setting (85%+) specifically chosen to keep visual sharpness close to the original, since for this use case looking good matters more than reaching the smallest possible file size.
A landlord storing years of scanned lease agreements. A file cabinet's worth of old paper leases, scanned once and never needing to be edited again, each compressed at a low-to-middle quality setting purely to reduce the total storage used across a shared drive — the leases only ever need to be pulled up and read, never searched by exact clause text.
An event organizer emailing a scanned vendor contract. A vendor contract scanned on a phone comes out as a multi-megabyte file that bounces from a vendor's strict inbox size limit; compressing it at the default quality gets it through on the next attempt without needing to switch to a separate file-sharing link just to send one document.
A nonprofit preparing a scanned grant-compliance file for upload. A government grant portal caps uploads at 10MB per file; a scanned compliance binder well over that limit is compressed down to fit in one upload rather than being split across several separate submissions that the portal wasn't really designed to receive as a set.
How It Compares
| Feature | TechDriven Tools | Other Online Tools | Desktop Software | Command-Line Tools |
|---|---|---|---|---|
| Speed | Instant, no upload | Depends on upload speed | Depends on install | Instant, but needs setup |
| Privacy | Never leaves your device | Varies — check the site's policy | Local, but often needs install/updates | Local, fully offline |
| Control | One quality slider, live preview of the trade-off | Often fixed presets only ("low/medium/high") | Varies, sometimes many settings | Full control, but requires knowing the flags |
| Mobile-friendly | Yes | Varies by site | No | No |
| Free | Always | Often freemium / capped | Often paid | Free, but not beginner-friendly |
| Ease of use | One slider, one click | Varies | Menu-driven | Typed commands |
If keeping selectable, searchable text matters more than reaching the smallest file size, a different re-import or re-export step isn't a shortcut around this trade-off — the underlying limitation (raster re-encoding removes text) is inherent to this compression technique, not something specific to this tool.
Common Mistakes
Expecting text to stay selectable afterward
Compression re-renders every page as an image — that's the entire mechanism behind the size reduction. Text that was selectable and searchable in the original becomes part of a picture in the compressed result. This isn't a bug or a missing setting; it's the direct, unavoidable consequence of how this specific compression approach works.
Compressing a file that's already mostly text
A text-heavy PDF with few or no images has little to gain from this kind of compression, since there's not much visual complexity to re-encode more efficiently — the size savings on a plain text document are often small, while the cost (losing selectable text) stays the same. For a mostly-text file, this trade-off is rarely worth making.
Not keeping the original file
Compression is one-way — there's no way to recover the original selectable text or full resolution from a compressed result. Always keep the original file until you're sure you won't need it in its uncompressed, text-searchable form again.
Assuming a higher quality number always means "better"
Higher quality means less visual compression and a larger file, not a qualitatively different or more correct kind of output — there's no hidden "best" setting, just a direct trade-off between size and sharpness that depends entirely on what the file will be used for.
Trying to hit an exact target file size directly
The tool doesn't take a target size as an input — you choose a quality percentage and see the resulting size afterward. Getting close to a specific target (a 2MB email cap, for instance) usually takes one or two tries at different quality levels rather than one calculated setting.
Compressing a password-protected file first
A PDF that requires a password to open can't have its pages read at all, so compression fails immediately rather than partially processing the file. Remove the password first, then compress the unprotected copy.
Compressing the same file twice expecting further savings
Running compression again on an already-compressed file compounds JPEG generation loss for diminishing size returns, rather than shrinking it further the way a second pass might on a genuinely losslessly-packed file. If more savings are needed, go back to the true original and compress it once at a lower quality — see "Compressing an Already-Compressed File" below.
Not checking the result before deleting the original
Since compression can't be undone, it's worth actually opening and reviewing the compressed result — confirming it looks acceptable and that nothing important became illegible — before deleting or overwriting the original file it came from.
Assuming compression will fix an already-oversized scan by itself
Compression reduces file size at a given resolution, but it doesn't fix an underlying problem like a document scanned at an unnecessarily high resolution to begin with. For a recurring workflow that regularly produces oversized scans, it's often more effective to scan at a lower resolution in the first place (see "Color Scans vs. Black-and-White Scans" above for a related idea) than to rely on compression to clean up every file after the fact.
Best Practices
Start at the default and adjust from there
The default 65% quality is a reasonable middle ground for most documents. Run it once, check the result size and how it looks, then adjust up or down and re-run rather than guessing at an extreme value on the first attempt.
Match the quality level to how the file will actually be used
A file being archived for occasional reference can usually tolerate a much lower quality setting than one being professionally printed or displayed at high zoom — decide how the compressed file will actually be viewed before choosing how aggressively to compress it.
Compress scanned documents more aggressively than photo-heavy ones
A scanned text document is often still legible at a fairly low quality setting, since sharp photographic detail was never really the point. A file built around real photographs generally needs a higher quality setting to avoid visible compression artifacts in the images themselves.
Keep the uncompressed original in a separate, clearly labeled place
Since compression can't be undone, store the original file somewhere it won't be confused with the compressed copy — a consistent naming convention (keeping "-original" or "-full" in the source file's name) avoids accidentally treating the compressed version as the master copy later.
Merge before compressing, not after, when doing both
If a document needs to be both combined from several files and made smaller, merge first and compress the single combined result — one compression pass on the final file is simpler and more predictable than compressing several pieces separately and merging already-compressed pages together. Merging first also means every page gets compressed at exactly the same quality setting, rather than ending up with a visibly inconsistent mix of compression levels from files that were each compressed separately before being combined.
Check the result at actual size, not just zoomed in
Compression artifacts are most visible when zoomed in close; if the file will normally be viewed at a normal reading size (on screen or printed), judge the result at that size rather than being overly cautious based on how it looks at maximum zoom.
Name the compressed output distinctly from the original
The result downloads as compressed.pdf by default — rename it on save (adding "-compressed" or similar to the original filename) rather than letting it sit in a downloads folder indistinguishable by name from the source it came from.
Consider whether the file even needs to be a PDF once compressed
For a single-page or few-page scanned document that's being compressed purely for image quality reasons, converting it directly to an image format afterward (PDF to JPG) is sometimes a better fit than staying in PDF form, particularly if the destination — a web page, a photo-sharing context — expects an image file rather than a document.
Troubleshooting
The compressed file isn't much smaller than the original
This is expected for a mostly-text PDF with few images — there's limited visual complexity to re-encode more efficiently, so the size reduction from this kind of compression is naturally smaller than it would be on an image-heavy scan. Try a lower quality value; if the size still doesn't drop meaningfully, the original likely wasn't a good candidate for this kind of compression to begin with.
"This PDF has no pages" or the file won't process
This usually means the file is corrupted, empty, or genuinely not a readable PDF despite its extension. Try opening it directly in a PDF viewer outside this tool first — if it fails there too, the file itself needs to be re-obtained from its original source.
The result looks noticeably blurry or blocky
This is a direct sign the quality setting was too low for that particular file's content — re-run at a higher quality value. Photos and fine detail show compression artifacts more visibly than plain scanned text, so the same quality percentage can look fine on one document and rough on another.
Processing takes a long time on a large file
Every page is genuinely being rendered and re-encoded, not just copied, so processing time scales with page count and each page's visual complexity — an expected characteristic of this approach, not a stall. Files over 60 pages automatically render at a slightly reduced scale specifically to keep this reasonable; a very long, image-heavy document will still take longer than a short one regardless.
"This PDF is password-protected"
The file needs a password just to open it, which blocks reading its pages at all. Remove the password first — see Unlock PDF — then compress the unprotected copy.
The text in the compressed file can't be searched or copied anymore
This is the expected, disclosed trade-off of this compression method, not an error — every page becomes a rendered image, so any text on it is now part of a picture rather than real text. If searchable text needs to be preserved, this specific compression approach isn't the right tool; see "When Not to Compress" below.
The compressed result looks different from what you expected on a specific page
Since every page is independently rendered and re-encoded, a page with unusual content — a very high-contrast graphic, fine hairline rules, or small dense text — can show compression artifacts more visibly than the rest of the document even at the same quality setting the other pages handled fine. If one specific page looks noticeably worse than the rest, that's a property of that page's content, not a sign the whole file was processed incorrectly.
The browser tab becomes unresponsive during compression
Rendering and re-encoding many large, high-resolution pages in a row is genuinely demanding work happening entirely on your device — a brief period of an unresponsive tab on a very long or very image-heavy file is expected, not a crash. Give it time to finish rather than reloading the page partway through, which would lose the progress made so far and require starting over.
Deep Dive
What Is PDF Compression, in This Tool's Specific Sense
"Compression" covers more than one real technique in the PDF world — this tool uses one specific, disclosed approach: rendering every page as an image and re-encoding it at a chosen JPEG quality, then rebuilding a new PDF from those images. This is different from, and more aggressive than, techniques that only downsample embedded images while leaving real text objects untouched. It produces large size reductions, especially on scanned or photo-heavy documents, at the cost of converting every page — including any real text — into a picture.
Benefits of a Smaller File
A smaller file uploads faster, attaches to email without hitting size limits, loads faster when opened from a slow connection, and takes up less storage when archived in bulk. For scanned documents especially — which are already effectively images regardless of compression — this is close to a pure win, since there was no real selectable text to lose in the first place.
The Core Trade-off: Size vs. Sharpness vs. Text
There are really two related trade-offs happening at once. The first is the familiar one: lower quality means smaller file, more visible compression artifacts. The second, easy to overlook, is that the process itself — regardless of the quality percentage chosen — converts every page from real vector text and objects into a flat raster image. A quality setting of 92% still produces an image-based page; it's just a very high-fidelity image. This is why the tool's own hint text discloses the text-selectability trade-off up front rather than only in the fine print.
Why Text Stops Being Selectable
Once a page is rendered to a canvas and re-encoded as a JPEG, what was previously distinct text characters, positioned and encoded as real PDF text objects, becomes indistinguishable pixel data — visually identical, but with no underlying character information left for a PDF viewer to let you select, search, or copy. This is a direct, physical consequence of the rendering step, not a setting that could be preserved with a different quality choice.
Page Count and Automatic Scale Reduction
Rendering every page of a very long PDF at full resolution would be slow and memory-intensive in a browser tab. For files over 60 pages, the render scale automatically drops slightly (from 1.5x to 1.1x) to keep processing time and memory use reasonable — a small, usually barely noticeable quality trade specifically for very long documents, applied automatically rather than left as one more manual setting to configure.
Security Considerations
Since the file is read directly into your browser's memory and never uploaded, compressing a scanned contract or a financial document carries the same privacy profile as opening it locally — nothing about the compression process introduces a new place for that content to be stored or exposed, which matters given how often compression gets used specifically on scanned paperwork containing sensitive information.
Compressing on a Mobile Device
The quality slider and run button work identically on a phone browser, though rendering many pages at full resolution asks more of a phone's processor and memory than a desktop — for a very large file, expect it to take longer on mobile, and consider a slightly lower quality setting if processing feels slow.
Business and Education Use Cases
In an office, this is the tool for getting a scanned contract or an image-heavy report under an email attachment limit, or shrinking an archive of old paperwork before long-term storage. In education, it's compressing scanned assignments before uploading to a portal with its own size cap, or shrinking a large lecture-slide export for easier distribution to a class.
Why This Approach Instead of a Gentler, Text-Preserving One
A less aggressive compression technique — one that only downsamples embedded images while leaving real text objects alone — would preserve selectable text, but produces meaningfully smaller size reductions on the kind of files people most often need to compress: scanned documents, where the entire page is already an image with no real text objects to begin with. For that majority use case, a text-preserving approach has nothing extra to offer, since there's no text object being protected in the first place, while a full re-render approach reliably shrinks the file regardless of what it's made of. The trade-off this tool makes is deliberately tuned for that common case, with the honest disclosure that it costs any real text that did exist on a page.
What Doesn't Compress Well
Pages that are already mostly white space with a small amount of crisp text — the classic plain letter or memo — don't have much visual complexity for a JPEG encoder to exploit, so the size reduction on these is often modest regardless of quality setting. Similarly, a PDF that's already been through lossy compression once (whether by this tool or another) has less genuine redundancy left to remove, so a second pass tends to cost more in visible quality than it saves in size — see "Compressing an Already-Compressed File" above.
Industry Applications
Real Estate
Shrinking photo-heavy listing brochures and property disclosure packets for faster email delivery to prospective buyers and agents.
Legal
Reducing the size of scanned exhibits and discovery documents for e-filing systems with strict upload size caps, where the documents are already scanned images with no real selectable text to preserve.
Healthcare
Compressing scanned patient intake forms and referral letters before storage, where legibility for reference matters more than exact text searchability of a form that was handwritten or scanned to begin with.
Education
Shrinking scanned assignments, lecture handouts, and photo-heavy project reports to fit institutional upload limits.
Government and Public Sector
Reducing the size of scanned permit applications and supporting documents for portals that reject oversized uploads outright.
Publishing and Media
Producing a lighter-weight version of a photo-heavy portfolio or proof PDF for quick email review, keeping a full-resolution master file separate for final production use.
Insurance
Shrinking scanned claims documentation — photos of damage, incident reports, completed forms — before uploading to a claims portal with its own file-size ceiling.
Finance and Accounting
Compressing scanned receipts and statements collected over a reporting period before archiving them, where the total storage footprint of years of scanned paperwork adds up meaningfully over time.
Non-Profit and Grant Administration
Shrinking scanned supporting documentation — receipts, signed forms, photo evidence of program activities — before uploading to a funder's reporting portal, many of which impose the same strict per-file size limits as government systems.
Compression and Accessibility
Because every page becomes a flat raster image, a screen reader has nothing to read from a compressed page — there's no underlying text for assistive technology to access, regardless of how legible the page looks visually to a sighted reader. This is a meaningful, separate consequence from the "can't select or search text" trade-off already covered: it means a compressed PDF is not accessible to a screen-reader user in any practical sense, even if the original, uncompressed file was. For any document that has, or might need, an accessibility or legal-compliance requirement (a public-facing government document, for instance), that requirement should be weighed seriously against the size savings before compressing — and if both a smaller file and accessibility are genuinely required at once, the honest options are re-adding a text layer to the compressed result via OCR, or finding size savings a different way that doesn't rasterize the page (removing unnecessary pages, for instance).
This also affects any tagged structure the original PDF had — heading levels, reading order, alternative text for images — none of which has meaning once a page is a single flat picture. A document produced specifically to meet an accessibility standard should generally never be run through this kind of compression at all, since doing so would undo the accessibility work regardless of how good the compressed page still looks visually.
Color Scans vs. Black-and-White Scans
A scanned page with less color variation — a black-and-white or grayscale document, for instance — has inherently less visual detail for the JPEG encoder to work with than a full-color scan, so it tends to compress more efficiently at the same quality setting. This isn't a separate setting to choose in this tool; it's simply a property of the source content itself. If a document is being scanned specifically with compression in mind, scanning in grayscale rather than color when the original content doesn't actually need color (a plain text document, for instance) can produce a smaller starting file even before this tool's own compression is applied on top.
The same logic applies in reverse: a document that genuinely needs its color to be meaningful — a chart with color-coded categories, a photograph, a highlighted annotation — loses real information if scanned in grayscale to begin with, regardless of how it's compressed afterward. The choice of whether to scan in color is about what the document actually needs to communicate, not just about producing the smallest possible file.
Handling Many Files Efficiently
Since this tool compresses one file at a time by design, working through a large batch is fastest with a consistent rhythm: add a file, set the quality, run, download, then start the next one — rather than closing and reopening the tool between every single file. One detail worth planning around: the quality slider resets to its 65% default each time you start a new file rather than remembering the last value used, so for a batch where the same specific quality matters (not just "roughly similar"), re-set the slider deliberately on every file rather than assuming it carried over from the last one.
For a genuinely large batch — dozens of files rather than a handful — it's worth budgeting real time for the task, since each file's processing time scales with its own page count and complexity, and there's no way to queue multiple files to process unattended in the background. Downloading each result immediately after it finishes, rather than letting several pile up, also avoids the confusion of several similarly-named compressed.pdf downloads sitting in the same folder waiting to be sorted out afterward.
Compress vs. Similar Terms
- Compress vs. Optimize. "Optimize" sometimes refers to a gentler process that removes redundant objects and downsamples images while leaving real text intact. This tool's compression is more aggressive and rasterizes every page — a genuinely different technique, not just different branding for the same thing.
- Compress vs. Reduce File Size. Same operation, different phrasing — "reduce PDF file size" describes exactly what this tool does.
- Compress vs. Shrink. Also the same operation under a more casual name.
- Compress vs. Resize. "Resize" usually refers to changing a page's physical dimensions (its width and height), not its file size — a completely different operation from compression, which leaves page dimensions unchanged.
- Compress vs. Zip. Zipping a PDF wraps the existing file in a lossless archive format without changing the PDF itself at all — it can shrink the file somewhat if it isn't already tightly packed, but nowhere near as much as re-encoding the visual content, and it doesn't touch text selectability at all since the PDF inside is completely unchanged.
- Compress vs. Downsample. "Downsampling" specifically means reducing an image's pixel resolution, which is one contributing factor in why this tool's output is smaller (pages render at a fixed scale rather than the source's native resolution), but the JPEG quality re-encoding is the larger factor in the overall size reduction.
- Compress vs. Flatten. "Flattening" a PDF usually means merging interactive form fields or layers into static page content — a related but distinct idea from compression, though this tool's rendering step does, as a side effect, flatten every page into a single static image.
Under the Hood
Compression is handled by two libraries working together in your browser: pdf.js renders each page of the source PDF onto an HTML canvas at a chosen scale (1.5x normally, dropping to 1.1x automatically for files over 60 pages), and the canvas is then encoded to a JPEG blob at your selected quality using the browser's native canvas.toBlob() API — the same JPEG encoder every browser already ships for saving images. That JPEG is embedded into a brand-new PDF document built with pdf-lib, one page at a time, sized to match the original page's dimensions so the output isn't visually resized even though its content is now a raster image.
This page-by-page render-encode-embed cycle is why compression takes noticeably longer than a copy-based operation like merging or splitting — every single page is genuinely being redrawn from scratch, not just transferred. It's also why the canvas is explicitly cleared (its width and height reset to zero) after each page: rendering many large pages in a row can use a meaningful amount of browser memory, and releasing each canvas immediately after it's been encoded keeps peak memory use down across a long document.
The before-and-after size comparison shown in the result message is computed directly from the real byte lengths of the original file and the newly-generated PDF — not an estimate, but the actual measured difference between what you uploaded and what was produced.
The library and browser APIs involved — the Canvas 2D rendering context, canvas.toBlob(), and the File API for reading the upload — are supported by every current major browser on both desktop and mobile, with no plugin or extension required. The same code path runs regardless of which browser is being used, which is why the tool behaves the same way on a phone as it does on a laptop, aside from raw processing speed. Notably, none of this depends on a dedicated image-processing library — the JPEG encoder used here is the exact same one a browser already ships internally for tasks like saving a canvas drawing or exporting a photo edited in-browser, just applied here to a rendered PDF page instead.
Document Metadata After Compression
Because the compressed result is built as a brand-new PDF document — not a modified copy of the original — the source file's title, author, subject, and keyword metadata does not carry over automatically. The compressed file starts with blank metadata (aside from a default producer/creator tag identifying the PDF library used to build it), the same as a freshly created document. If the compressed file needs specific title or author metadata, set it explicitly afterward with Edit PDF Metadata, applied to the finished compressed file.
Compressing an Already-Compressed File
Running this tool again on a file it already compressed will process it exactly as it would any other PDF — but the result is generally worse than compressing the true original at the desired quality directly. Because JPEG compression is lossy, re-encoding an image that's already been through one lossy pass compounds the quality loss (sometimes called "generation loss"): the second pass discards more detail on top of what the first pass already discarded, often without much further size reduction to show for it. If a smaller result is needed after an initial compression, it's meaningfully better to go back to the original file and compress it once at a lower quality setting than to compress the already-compressed output a second time.
This is a genuinely easy mistake to make without realizing it, since a file that's already been compressed once looks and opens exactly like any other PDF — there's no visible marker distinguishing a once-compressed file from an original. Keeping a clear naming convention (see "Best Practices" above) is the practical safeguard against accidentally feeding an already-compressed file back into the tool a second time.
Printing a Compressed PDF
Because compression converts every page into a fixed-resolution raster image, how it looks when printed depends on that image's resolution relative to the printer's own resolution — a page compressed at a low quality and rendered at a modest scale can look noticeably softer on paper than it did on a screen, especially at larger print sizes, since a printer has no extra text or vector detail to fall back on once a page has become a picture. For anything being sent to print rather than just viewed on screen, it's worth compressing at a higher quality setting than you might choose for a purely digital copy, or keeping the print job on the uncompressed original entirely if maximum sharpness matters.
This is most noticeable at larger print sizes or when a document is printed and then photocopied or scanned again — each additional generation of reproduction compounds whatever softness the original compression introduced. For a one-off standard-size printout for internal reference, the difference is often negligible; for anything being professionally printed, bound, or reproduced at scale, printing from the uncompressed original is the safer default.
Choosing a Quality Level: A Practical Guide
There's no universally correct quality setting — the right value depends on the source content and how the result will be used. As a starting point: 30–45% produces the smallest files, suitable for text-only scans being archived where legibility at normal reading size is the only requirement. 50–70% (the default sits at 65%) is a reasonable general-purpose middle ground for most everyday documents, balancing noticeable size savings against still-acceptable sharpness. 75–92% keeps visual quality close to the original, appropriate for photo-heavy documents or anything that might be printed or viewed at higher zoom, at the cost of smaller size savings. Since the tool shows the exact resulting size immediately after each run, the fastest way to find the right setting for a specific file is to try the default first, then adjust up or down by 10–15 percentage points based on the result, rather than trying to predict the right number in advance.
How much size a given quality setting actually saves depends heavily on what's on the page, not just the percentage chosen. A plain black-and-white text scan has relatively little visual complexity to begin with, so it tends to shrink noticeably even at a fairly high quality setting. A page dense with full-color photographs has much more visual information, so the same quality percentage produces a proportionally larger result and a more visible difference between quality levels. A mixed document — some text pages, some image-heavy ones — lands somewhere between the two, with the image-heavy pages contributing most of both the original size and the eventual savings. This is worth keeping in mind when comparing results across different documents: seeing a much bigger percentage reduction on one file than another at the identical quality setting isn't inconsistent behavior, it's a direct reflection of how different the two files' underlying content actually was.
When Not to Compress
This specific compression approach is a poor fit whenever the compressed file still needs to function as real, searchable, selectable text — a contract that needs to remain text-searchable for legal review, a report that needs to be accessible to a screen reader, or any document that will later need its text copied, searched, or read aloud. It's also not the right choice for a document that will be OCR'd or text-extracted downstream, since compression happens before that step would ever see real text to extract — the raster image it produces would need to go through OCR again, with all the accuracy limitations that implies, to get any text back out at all. For any of these cases, the more honest fix is reducing file size a different way (removing unnecessary pages with Remove Pages, or accepting a larger but fully text-intact file) rather than trading away searchability for size.
It's also worth pausing before compressing a document that's genuinely small already — a five-page text memo at a few hundred kilobytes doesn't need shrinking, and running it through this tool anyway would only cost the file its selectable text for no real practical benefit. Compression earns its trade-off specifically on files that are actually inconveniently large; applying it reflexively to every PDF regardless of size or content type is a case of the trade-off not being worth what it costs.
Expert Tips for Power Users
Test one representative page's worth of judgment before committing to a batch
If compressing many similar documents (a batch of scanned receipts, for instance), run the first one at a candidate quality level, check whether the result is acceptable, and only then apply that same setting to the rest — rather than discovering after compressing twenty files that the quality chosen was too aggressive for all of them. Pick the most visually demanding file in the batch as the test case, not the simplest one, since a quality setting that looks fine on a plain page can still fall short on one with denser photos or finer print.
Keep a "master" and a "distribution" copy as a standing convention
For documents that get compressed regularly (a recurring report template, for instance), establish a simple naming convention that separates the always-uncompressed master from the compressed version made for sharing, so it's never ambiguous which one is safe to further edit or re-compress from.
Compress after OCR, never before
If a scanned document needs OCR to add a searchable text layer (see OCR PDF), do that first, then decide whether the OCR'd result also needs compressing. Compressing before OCR would destroy the very text an OCR pass is meant to detect, working against the point of running OCR at all.
Use a lower quality for internal reference copies, a higher one for anything client-facing
An internal archive copy that only needs to be legible on demand can usually tolerate more aggressive compression than a version being sent to a client or presented externally, where visual polish carries more weight.
Compare this tool's output against a scanning app's built-in compression before assuming more is needed
Many phone scanning apps already apply some compression when saving a scan as a PDF, so a file that still feels large after that step may need less additional compression than a raw, uncompressed source would — check the size after a scanning app's own export before assuming this tool needs to be set to an aggressive quality to make a meaningful difference.
Don't compress a file that's about to be merged or edited further
If a compressed page will later be merged with other files, or edited further, the compression's visual softening carries through to whatever it's combined into — compressing as the very last step, after all other editing and combining is finished, keeps every earlier step working with full-quality source material for as long as possible.
Practical Limits
There's no hard file-size or page-count limit enforced by the tool, and quality is adjustable across a fixed 30%–92% range — values outside that range aren't offered, since below 30% the visual result degrades to the point of limited usefulness, and above 92% the file-size savings become minimal for meaningfully more processing time. The practical ceiling for a very large or very long document is your device's available memory and processing power, the same as any other browser-based tool on this site — very long, image-heavy PDFs (several hundred pages) will take real time to process regardless of device, since every page genuinely has to be rendered and re-encoded.
A related, honest edge case: it's possible for a compressed result to end up the same size as, or even slightly larger than, the original — this can happen with a file that was already efficiently encoded, or one compressed at a high quality setting close to 92%. The tool detects this directly (comparing the real before-and-after byte sizes) and reports it plainly rather than claiming savings that didn't happen, suggesting a lower quality setting instead if a smaller file is still the goal.
Keyboard and Screen-Reader Accessibility of This Tool
The quality slider is a native HTML range input, fully operable with arrow keys once focused, and its live hint text updates in the same accessible status region pattern used throughout this site's tools, so a screen-reader user gets the same "X% — trade-off" feedback a sighted user sees visually. Processing status ("Re-encoding pages…," the final done message with the exact size comparison) is announced via an ARIA live region rather than only shown visually.
Reviewing Content Before You Compress and Send
Since compression is often the last step before a scanned document goes out to its recipient, it's worth using it as a natural checkpoint to confirm the file actually contains what it should — that every intended page scanned correctly, that nothing sensitive was accidentally captured in a scan meant to show something else, and that the page order is correct. Once a file has been compressed, going back to re-check the original for a problem discovered later means re-compressing from scratch rather than fixing just the one thing that was wrong, so it's a genuinely cheaper check to do before running compression than after.
A Realistic Workflow: From Scan to Shareable File
A common end-to-end path looks like this: photograph or scan a paper document with Scan to PDF, which produces a PDF built from photo-resolution page images — often large, since each page is effectively a full-resolution photograph. If the result needs to go through email or into a portal with a size limit, run it through Compress PDF next, choosing a quality level based on how the file will be used (see "Choosing a Quality Level" above). If several such scanned documents need to travel together as one file, decide the order — merge before compressing if the goal is one smaller combined file, or compress each individually first if they're headed to different destinations. This three-tool sequence (scan, optionally merge, then compress) covers the overwhelming majority of "I have paper and need a small, shareable PDF" situations without needing any software beyond a browser.
Compressed or Uncompressed: Which to Keep for Long-Term Records
For anything being kept as a long-term record rather than a one-time share — tax documents, contracts, official correspondence — the safer default is archiving the uncompressed original, not the compressed copy made for a specific purpose like an email attachment. Storage is generally cheap relative to the value of a document you might need in its fullest form later (for legal review, for instance, where searchable text matters), while a compressed copy is easy to regenerate from the original whenever a smaller version is needed again. Treat the compressed file as a disposable, purpose-built copy for a specific transfer, not the version of record — a simple habit that avoids ever being in the position of needing a document's real, selectable text again with only a compressed copy left to work from. This distinction matters most for anything with a genuine retention requirement — a signed contract, a filed tax document, a piece of official correspondence — where the file may need to be produced again years later in a form that stands up to scrutiny, not just a form that's visually legible on a screen today.
A practical habit worth adopting: name the archival original clearly enough that its status is obvious at a glance — a suffix like "-original" or "-archive" — so that anyone else who later finds the file in storage doesn't have to guess which of two similarly-named PDFs is the authoritative one to keep and which is the disposable compressed copy made for a one-time purpose.
Who This Is For — And Its Honest Limitations
This tool is a strong fit for shrinking scanned documents, image-heavy reports, and photo-based PDFs where visual legibility matters more than preserving real, selectable text — which covers the majority of everyday "my PDF is too big" situations. It's not the right tool for a few specific cases:
- Anything that needs to stay text-searchable or selectable afterward. This is the core, disclosed trade-off — see "When Not to Compress" above.
- Files with a genuine open password. The password has to be removed first, in a separate step, before this tool can read the file's pages at all.
- Mostly-text documents with little to gain. Compression's size savings come mainly from re-encoding visual complexity; a plain text document has comparatively little to save.
- Reaching an exact target file size in one step. The tool works by quality percentage, not by target size — getting close to a specific number usually takes a try or two.
- Multiple files in a single run. One file at a time; run the tool again for each additional file.
- Documents that must remain screen-reader accessible. Compression removes the underlying text a screen reader relies on — see "Compression and Accessibility" above.
- Anything already OCR'd where the searchable text layer matters. Compressing after OCR discards the very text layer OCR just added; compress before OCR instead, if both are genuinely needed.
Every one of these is a direct, explainable consequence of the underlying technique — render each page as an image, re-encode it at a chosen quality — not an arbitrary restriction. If a file needs to stay both small and fully text-intact, that combination genuinely isn't available from this specific approach, and it's more honest to say so plainly than to imply otherwise.
Glossary
Raster vs. vector
A raster image is a fixed grid of pixels — what every page becomes after this tool processes it. Vector content (real text, lines, shapes) is described mathematically and stays sharp at any zoom level. Compression here converts vector-and-text pages into raster ones, which is what makes the size reduction possible.
JPEG quality
A 0–100% setting (this tool exposes 30–92%) controlling how much visual detail a JPEG encoder discards to save space. Lower quality discards more detail for a smaller file; it's a "lossy" trade-off, meaning discarded detail can't be recovered.
Render scale
The resolution multiplier used when converting a PDF page to a canvas image before compression — higher scale means a sharper starting point (and a larger intermediate image) before the JPEG quality setting is applied on top of it.
Lossy compression
Compression that permanently discards some information to reduce size, as opposed to lossless compression (like a ZIP archive) which can be perfectly reversed. This tool's compression is lossy in two ways at once: the JPEG encoding itself, and the underlying loss of real text data.
Generation loss
The compounding quality loss that results from repeatedly re-encoding an already-lossy file — each additional JPEG pass discards more detail on top of what previous passes already discarded. See "Compressing an Already-Compressed File" above.
Canvas (HTML canvas)
A browser API for drawing and reading back pixel data programmatically. This tool renders each PDF page onto an in-memory canvas as an intermediate step before encoding it to a JPEG image.
Automation and Repeatability
This tool is a manual, one-file-at-a-time interface — there's no scripting API, no folder-watch mode, and no way to queue up a batch of files and walk away while they all compress unattended. For an occasional compression need, or even a moderate manual batch (see "Handling Many Files Efficiently" above), this is a non-issue. For a genuinely recurring, high-volume need — compressing hundreds of scanned documents on a regular schedule as part of an automated intake pipeline, for instance — a browser tool like this one isn't the right fit at that scale, and a script-based approach (calling the same kind of rendering and JPEG-encoding libraries directly, outside a browser UI) would be the more appropriate tool. Stating this plainly matters more than it might seem: a tool built around "open a browser tab, no install, no account" is deliberately trading away large-scale automation for simplicity and privacy, and someone evaluating this for a genuinely industrial-scale need deserves to know that trade-off exists rather than discovering it by trying to script around a UI that was never built for it.
Privacy & Security
- Files are never stored — nothing is written to a server, ever.
- All processing happens in your browser, using pdf.js and pdf-lib.
- No registration or account required to use any of this.
- Nothing is transmitted, so there's nothing in transit to intercept.
- Downloads come straight from your browser's own memory to your device.
From our blog: How to Compress a PDF Without Losing Too Much Quality